FOLLOW ME ON
STRESS-FREE PORTRAITURE & CUSTOM HEIRLOOMS FOR BUSY PROFESSIONALS & MOTHERS AT THE SHORE
REAL ESTATE
My name is Marianne Bley. I am a wedding, newborn & branding photography specialist. My home studio is located on Chadwick Beach Island in Lavallette, Ocean County New Jersey 08735.
I am passionate about capturing life's milestones, both big and small, for couples and growing families and assisting them in preserving their images by creating stunning wall displays and tabletop heirloom products to grace their living spaces with the ones they hold most dear to their hearts for generations to come.
WELCOME TO MY Blog
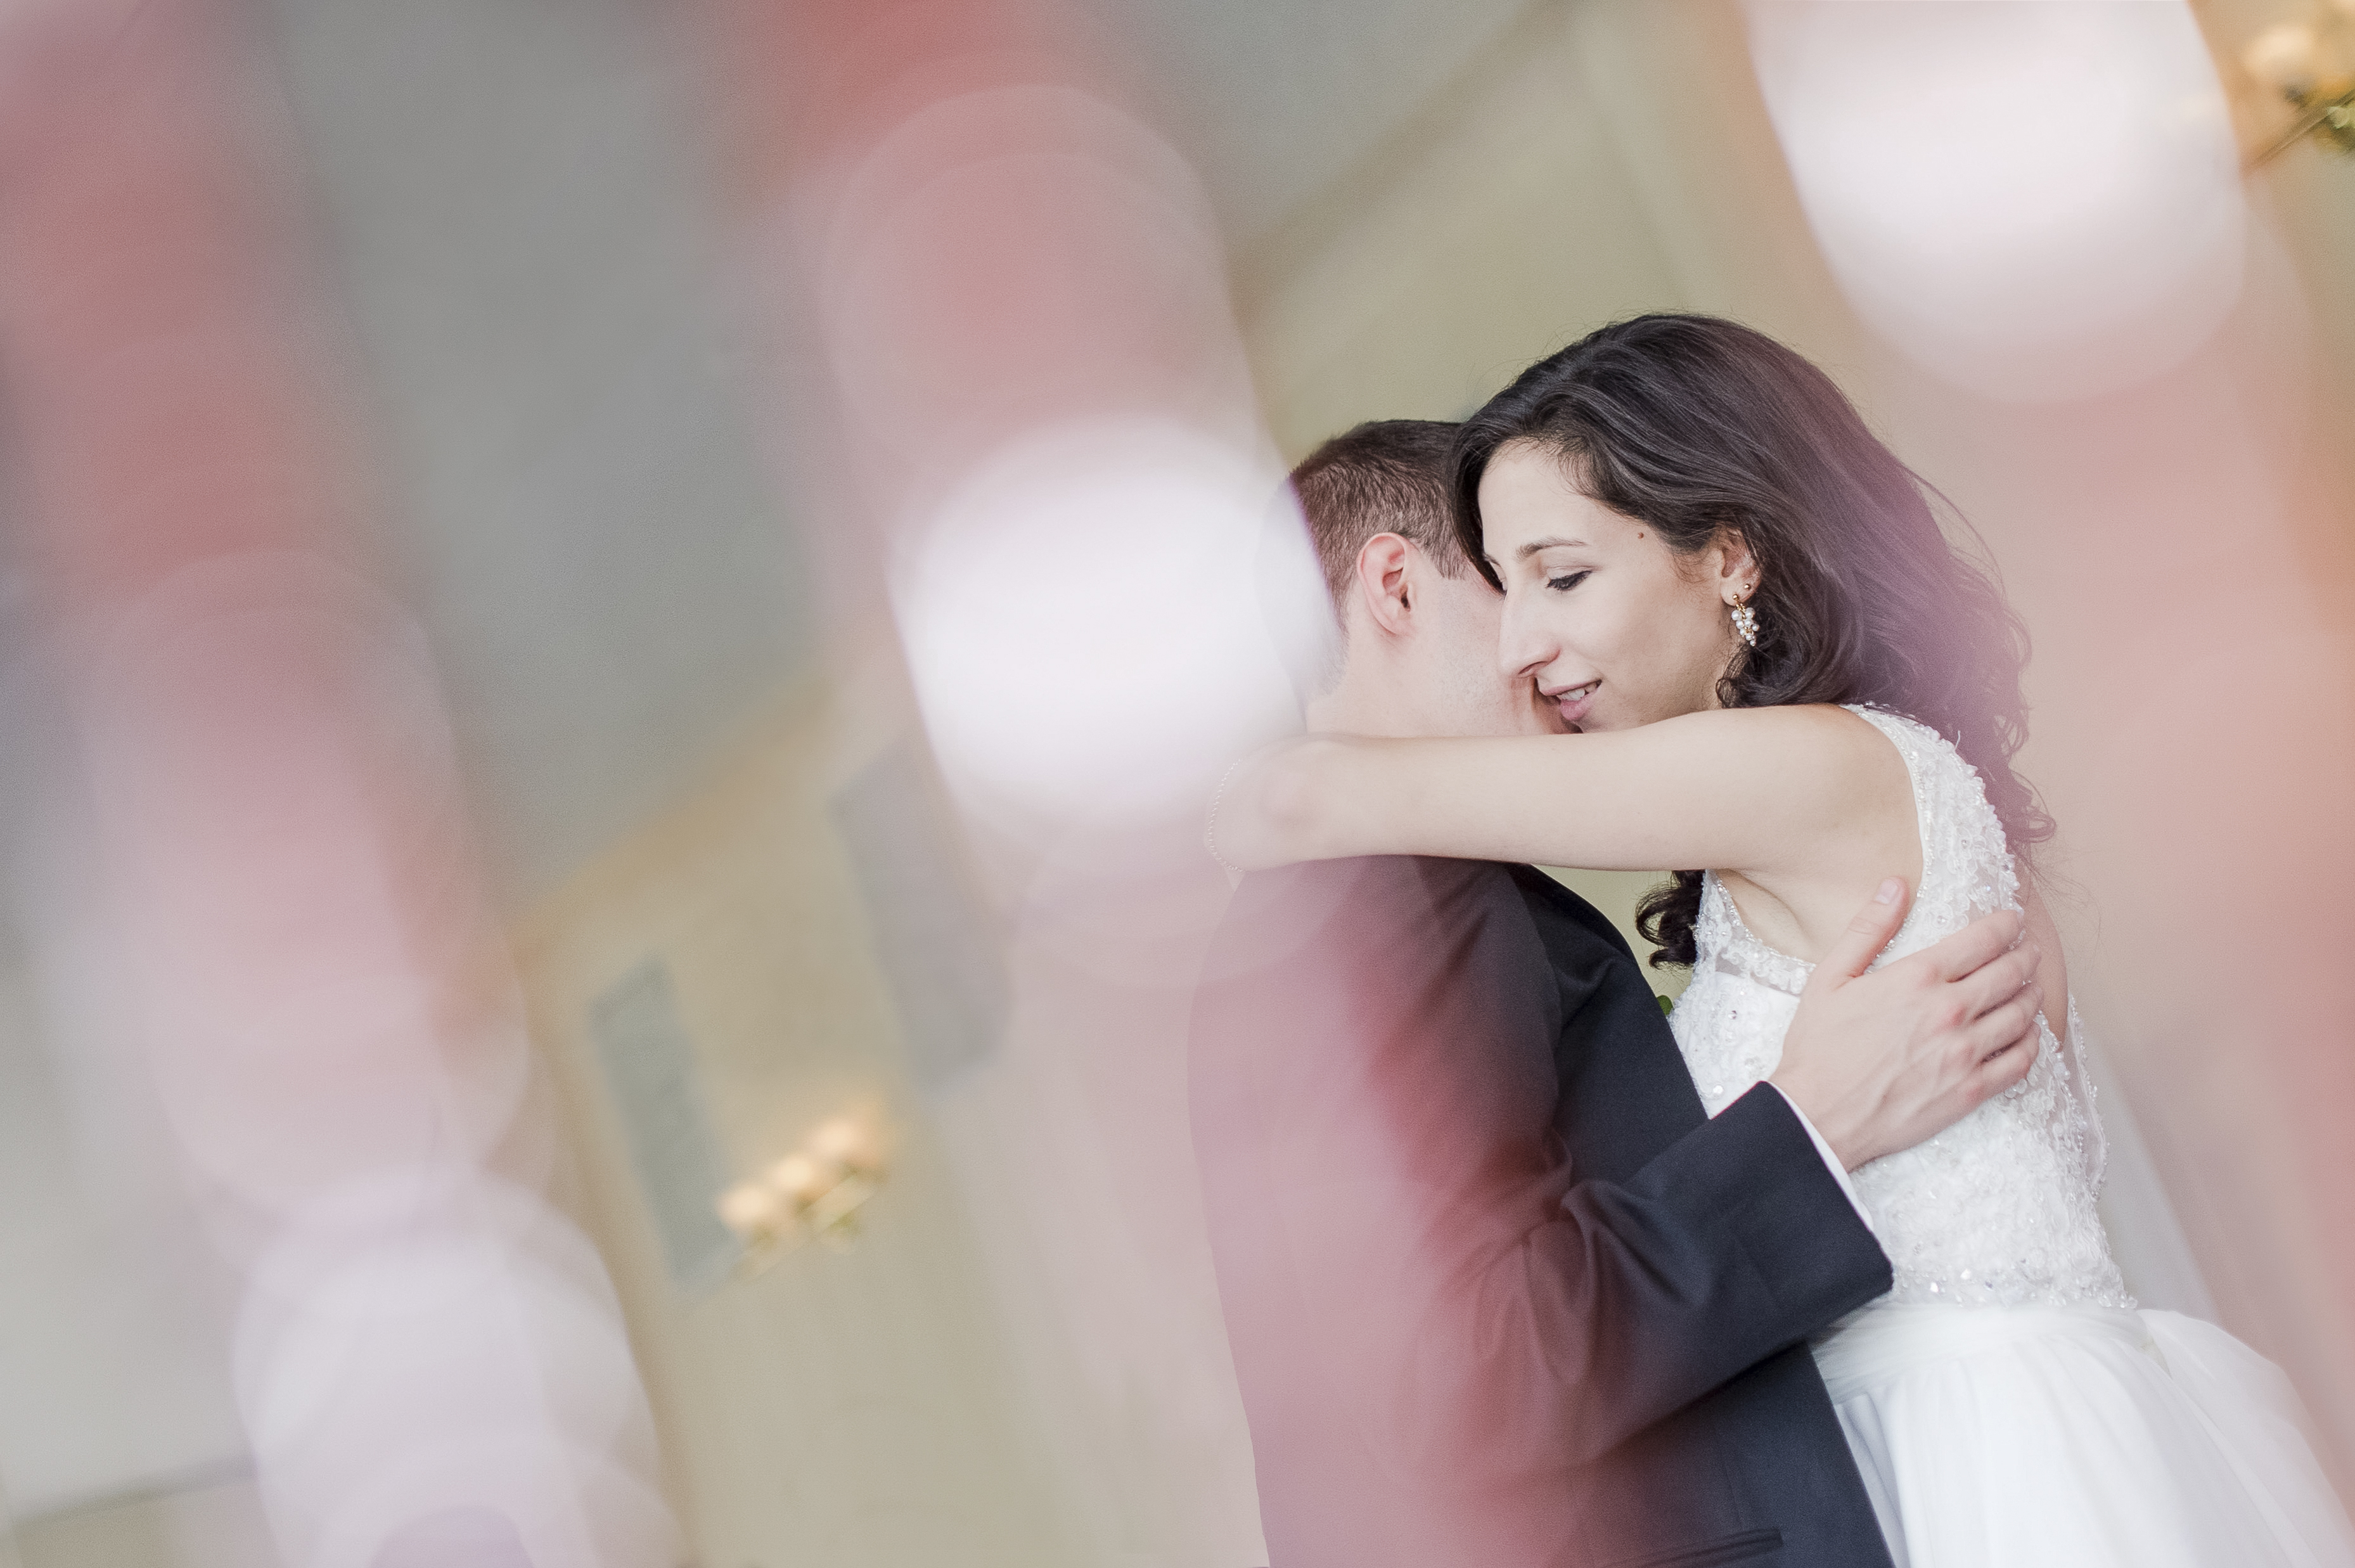
My New Editing Workflow Utilizing Arc Soft Portrait + | Rustic New Jersey Wedding Photographer
My New Editing Workflow Utilizing Arc Soft Portrait + | Rustic New Jersey Wedding Photographer
Throughout the past 6 years of running my photography business, I have been searching for the most efficient ways to edit entire weddings, as well as, smaller portrait sessions because I spend entirely too much time perfecting my images to look their very best. I am 100% an over-shooter, photographing far more images than needed for each client so I work with hundreds, if not thousands, of files pertaining to each of my clients events or portrait sessions.
In the summer months, I get particularly swamped with editing because I am photographing clients almost every day which leaves little time to edit each session in a short period of time. Presently, my workflow consists of 4 major steps. 1.) I bring all of my images into Photo Mechanic, where I cull/narrow down the images that I want to edit for the client. I love this program because I am able to see the images quickly and scroll through them effortlessly to find the best images without waiting for them to import into Lightroom. Then, when I go into Lightroom I have a lot less images in the collection so Lightroom will run faster and I do not need to import images into Lightroom that I will never edit. 2.) I color class the images that I want to edit, select them and drag them into Lightroom from Photo Mechanic. Once they are imported into Lightroom, I make global adjustments to sections of the session/event based on the lighting scenarios. After I make those adjustments, I dig a bit deeper and look for more in depth corrections that I would like to make like removing distracting objects in the background of my image. 3.) Next, I export all of the images at high resolution and put them into a new folder. Then, I scroll through those images for any other major adjustments needed in the background, like taking someone out of the background or fixing loose hairs around my subject that are a little trickier. Those images will be opened individually in Photoshop and tweaked to my likeness. 4.) My last step is a new one and certainly the most exciting because it saves me a lot of labor intensive steps in Lightroom or Photoshop. I import the entire completed folder into Portrait + and make my final adjustments to each persons face and skin.
When I opened Portrait + for the first time, my jaw hit my keyboard, literally. This program is so functional and the technology behind it is superb. I am really in love with the features that it has and I am going to briefly describe the functionality of the software. When you first open the software, it asks you if you would like to import images individually or import an entire folder. Once your images are imported into the software, you can create your own presets or use the pre-made presets that they have listed in the toolbar. There is a list including: slight smoothing, medium smoothing, major smoothing, smoothing + maintain freckles, smoothing + remove shine, smoothing + slim face, smoothing + smile, smoothing + whiten teeth, smoothing + brighten eyes, & smoothing + multiple effects. I prefer to make my own presets and use a little of everything: slight smoothing, brighten eyes, whiten teeth, remove shine etc… You can also change skin tones very easily using numbers in RGB or the sliding bar they provide. There are skin brightening adjustments that you can make using a adjusting, sliding scale or by dialing in a percentage. This is very helpful and these adjustments take literally a second, there is not waiting to see these adjustments, they happen right before your very eyes!
As far as enhancements, you can: remove eye circles, remove blemishes, brighten eyes, deepen smile, lift cheeks, slim face, enlarge eyes, enhance nose, remove shine & white teeth. Yes, you can change some major facial features to enhance the look of your client. I did play with these and I did think that there are a few features that I might never use, but you really never do know. I did make someones eyes bigger as their eyelids were just a little droopy and it made a world of differece. I do like my clients to look as natural as possible but the changes can be as subtle or drastic as you want based on the control that you have with this software. The last adjustment menu that I want to talk about is the makeup menu. You can add blush, lipstick, colored contacts, change eye color, add eye lashes, eye liner, eye shadow & shape eyebrows. I have not used this section as much as I have used the others but I can see it being very beneficial for headshot or fashion clients or even if a wedding client just looks a little washed out.
Once you have made all of your basic adjustments, you can save your settings as a preset and/or you can apply the adjustments to ALL of your photos in the click of a button! What I do, is make minor adjustments and apply them to every image that recognizes a face in the image and then I go back and see if there are any images that I would like to make more adjustments to. Afterward, I just export all of the images to a separate folder so I have the before and after images to compare my adjustments and make sure I am happy with the adjustments that I made before I deliver them to my client.
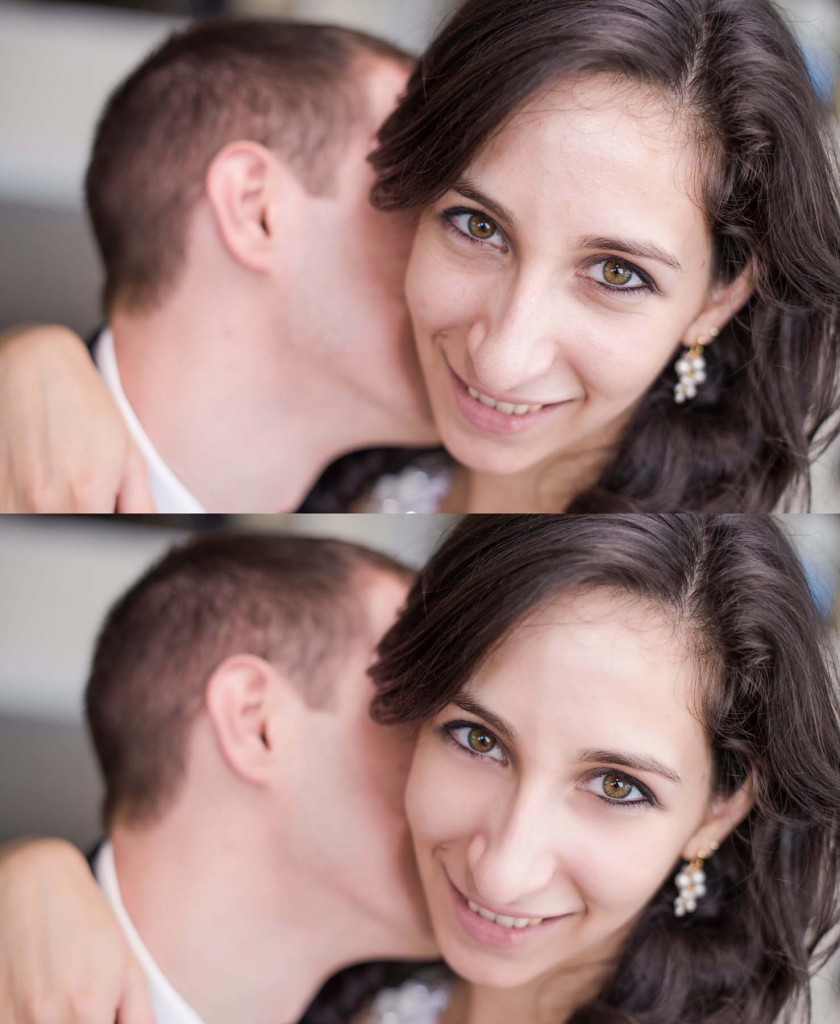
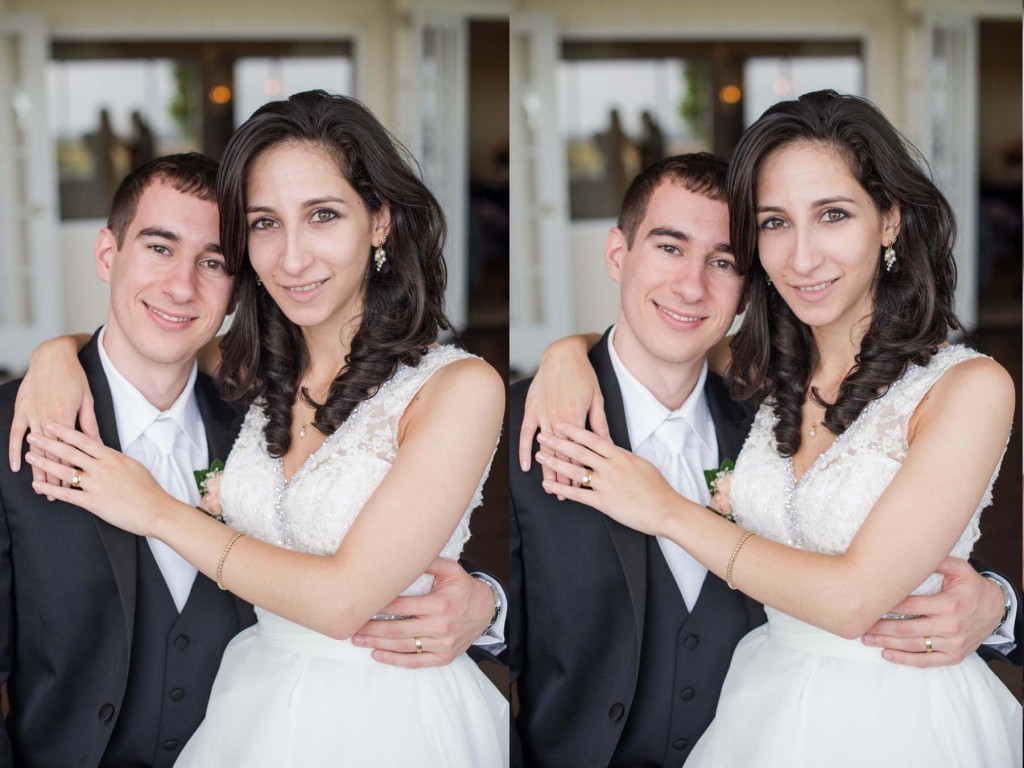
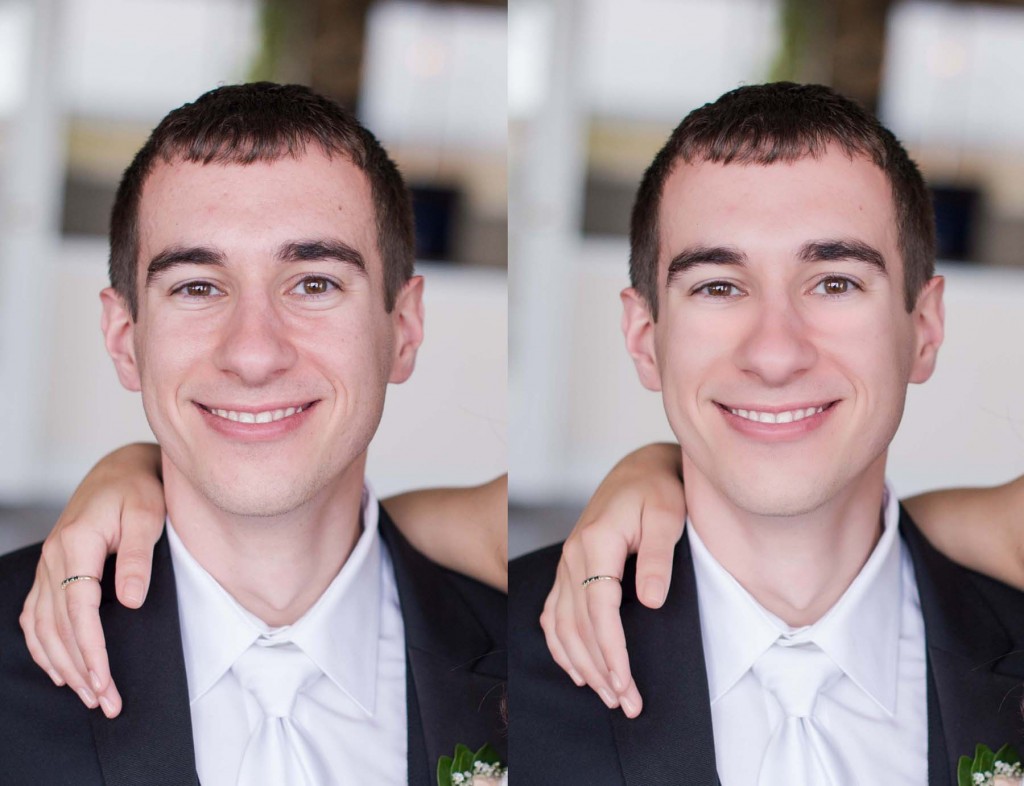
Here are a few before and after examples from a recent wedding that I used the Portrait + software on to drastically perfect my images. Notice their skin is softer, blemishes are removed, under eye circles were removed, teeth are whiter & the white of the eyes are whiter. I am in love with this new software! If used correctly, you will not make clients look overdone or fake. They simply look more polished, beautiful and natural all at the same time. 🙂
Before I finish up, I just want to explain 3 more functions that are really great. 1.) You can lock a face that you do not want to edit so the other face or faces in the image are edited and the ones that you do not want to edit will not be touched. 2.) You can adjust key points on the face. I have not played with this function too much either, but it looks like a great function to have so you are able to manipulate specific points on their face. 3.) You can also view each image side by side, before and after you made your adjustments, which is an amazing way to see if you adjustments are looking the way you want them.
Thank you so much for taking the time to read about my workflow and the amazing tools that Portrait + has to offer. I highly suggest you trying it out and if you would like to purchase the software, they offered an amazing discount to my readers. The Coupon Code Portrait45, will give you 45% off on any ArcSoft software! Please follow this link to purchase: http://www.arcsoft.com/portraitplus/?utm_source=imagerybymarianne&utm_medium=BD&utm_campaign=review
If you enjoyed this explanation and review of Portrait +, please share it and spread the word about it’s amazing tools for photographers!
September 16, 2014
Leave a Reply Cancel reply
SCHEDULE A CONSULT
Wedding, newborn & first year photography celebrating your love, growing family & life's milestones in a timeless and classic fashion.
trained by
follow us
Marianne Bley is a wedding, newborn & first year photography specialist that is passionate about capturing life's milestones, both big and small, for couples and growing families and assisting them in preserving their images by creating stunning wall displays and tabletop heirloom products to grace their living spaces with the ones they hold most dear to their hearts for generations to come.
about us
menu
Copyright 2024 Imagery by marianne bley NJ newborn photographer | nj wedding photographer | NJ FAMILY PHOTOGRAPHER| NJ Brand Photographer

Be the first to comment